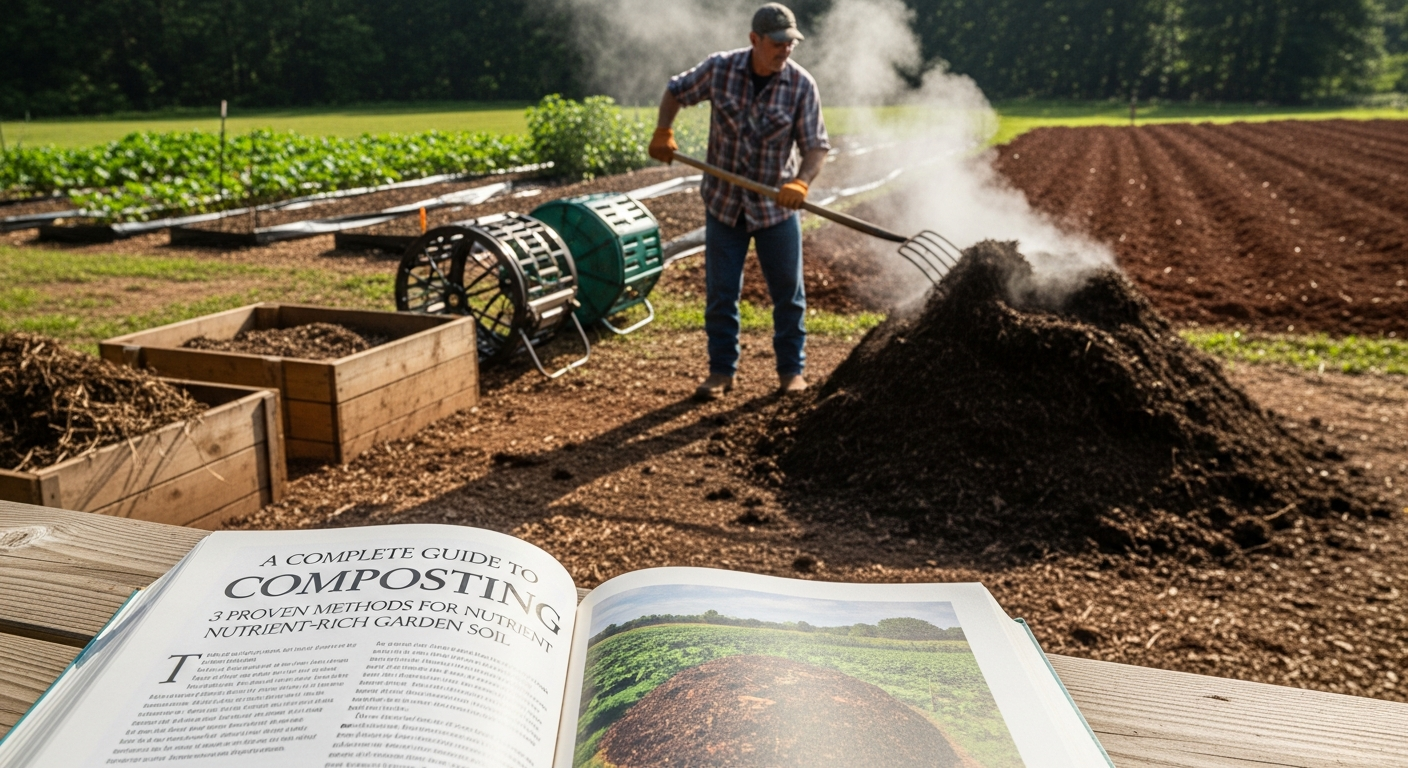
A Complete Guide to Composting: 3 Proven Methods for Nutrient-Rich Garden Soil
I can tell you that the secret to a truly vibrant garden isn’t found in a bag of synthetic fertilizer; it’s cultivated. Composting is the art and science of transforming everyday kitchen scraps and yard trimmings into ‘black gold’—a rich, living amendment that nourishes your plants, improves soil structure, and fosters a thriving ecosystem right beneath your feet. It’s a foundational practice for any sustainable garden, reducing waste while creating the perfect diet for everything from your prized heirloom tomatoes (Solanum lycopersicum) to your delicate delphiniums.
Key Takeaways
- Understand the Core Methods: There are three primary composting methods suitable for home gardeners: traditional aerobic composting (hot or cold piles), vermicomposting (using worms), and Bokashi (an anaerobic fermentation process).
- Balance is Key: Successful composting relies on a proper Carbon-to-Nitrogen (C:N) ratio, typically around 25-30 parts carbon (‘browns’) to 1 part nitrogen (‘greens’), along with adequate moisture and oxygen.
- Compost Improves More Than Fertility: Finished compost enhances soil structure, improves water retention, moderates soil pH, and supports a complex web of beneficial microorganisms that protect plants from disease.
The Deep Dive: Crafting Your Own Black Gold
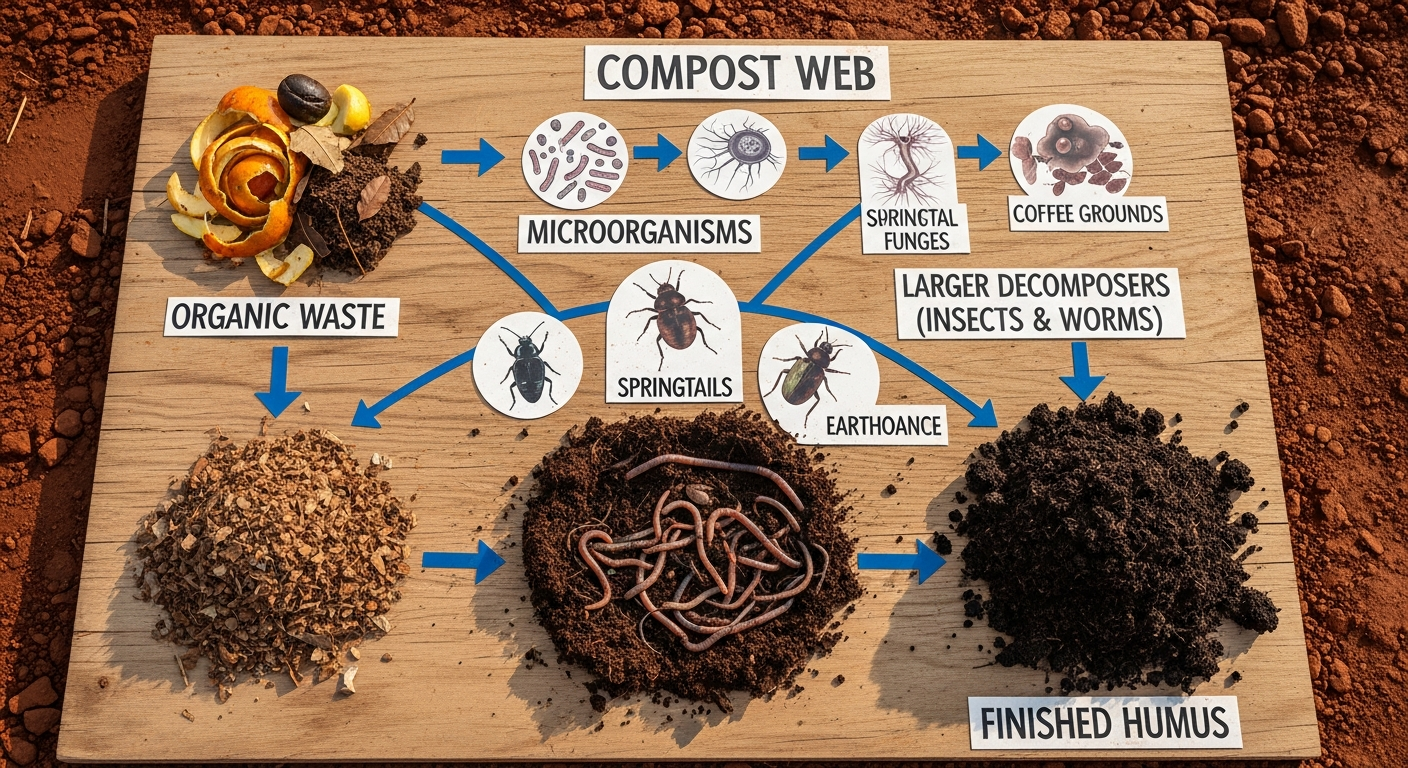
Before we explore the specific methods, let’s understand the magic happening within the pile. Composting is a process of controlled decomposition orchestrated by a host of microorganisms—bacteria, fungi, and actinomycetes—that break down organic matter into a stable, soil-like substance called humus. Our job as gardeners is simply to create the ideal conditions for these microscopic helpers to do their work.
Method 1: Traditional Aerobic Composting
This is the classic method most people picture: a pile or bin in the corner of the yard. It can be managed as a ‘hot’ pile for fast results or a ‘cold’ pile for a more passive approach. The goal is to provide oxygen (aerobic conditions) for the decomposers.
Step 1: Choose Your Structure and Location
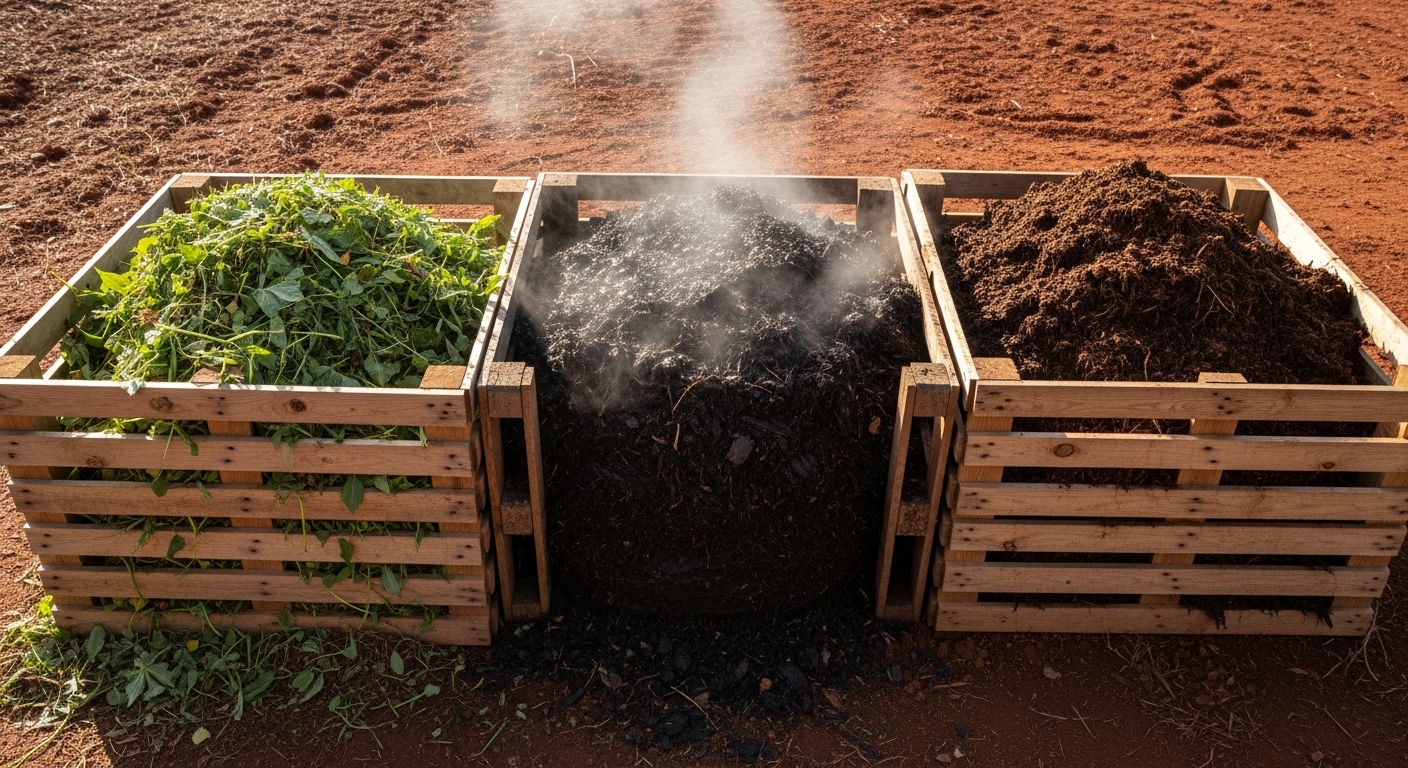
Select a level, well-drained spot that’s convenient to access but not so close that it becomes a nuisance. You can use a simple open pile, a circle of wire fencing, wooden pallets, or a commercial compost tumbler or bin. A system with at least two or three bins is ideal for managing compost at different stages of decomposition.
Step 2: Master the Carbon-to-Nitrogen Ratio (C:N)
This is the most critical element for success. Think of it as a recipe. You need a balance of ‘browns’ (carbon-rich) and ‘greens’ (nitrogen-rich). Aim for a ratio of roughly 3 parts brown to 1 part green by volume.
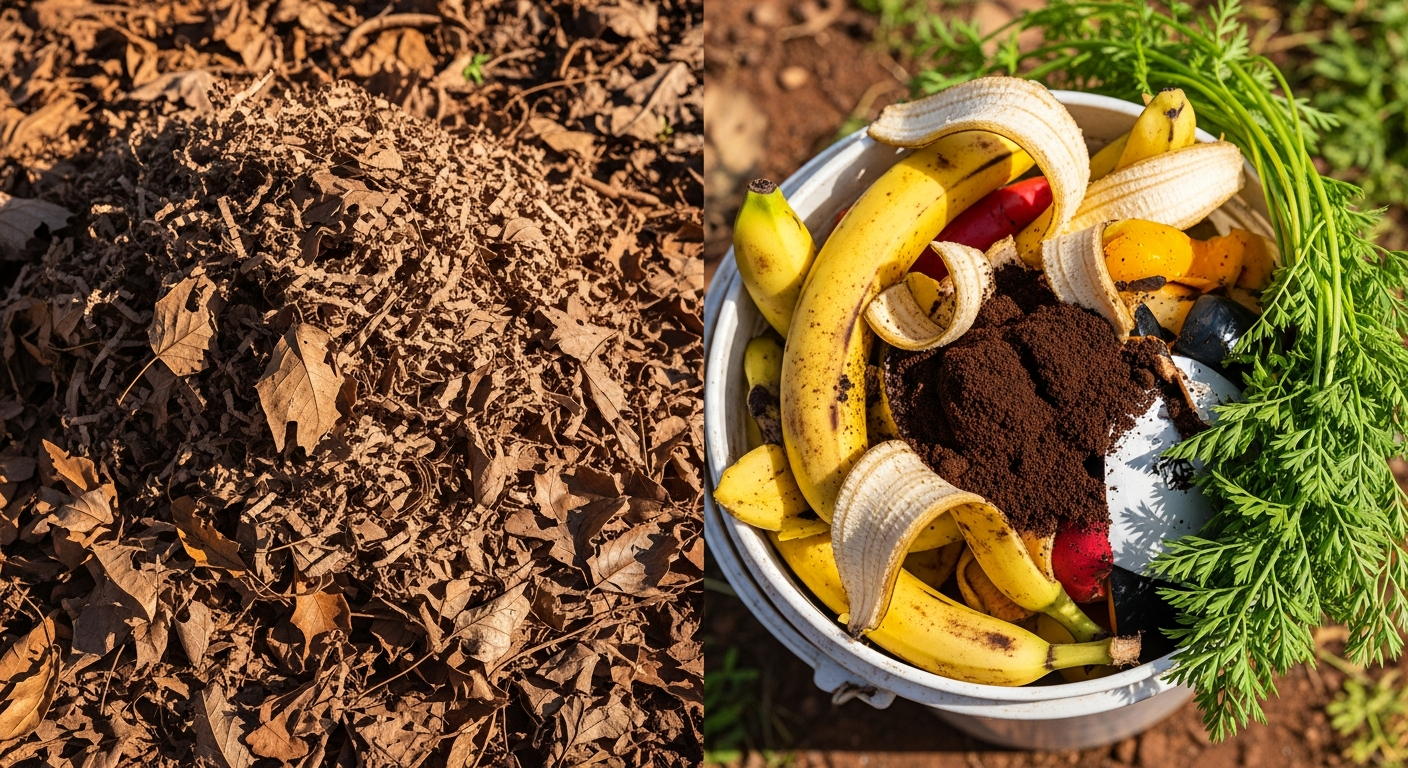
- Browns (Carbon): Dry leaves, straw, wood chips, sawdust, shredded newspaper, cardboard, and dried corn stalks. These provide energy for the microbes and create air pockets.
- Greens (Nitrogen): Fresh grass clippings, vegetable and fruit scraps, coffee grounds, eggshells, and manure from herbivores (like chickens or rabbits). These provide the protein and enzymes the microbes need to multiply.
Step 3: Build and Maintain the Pile
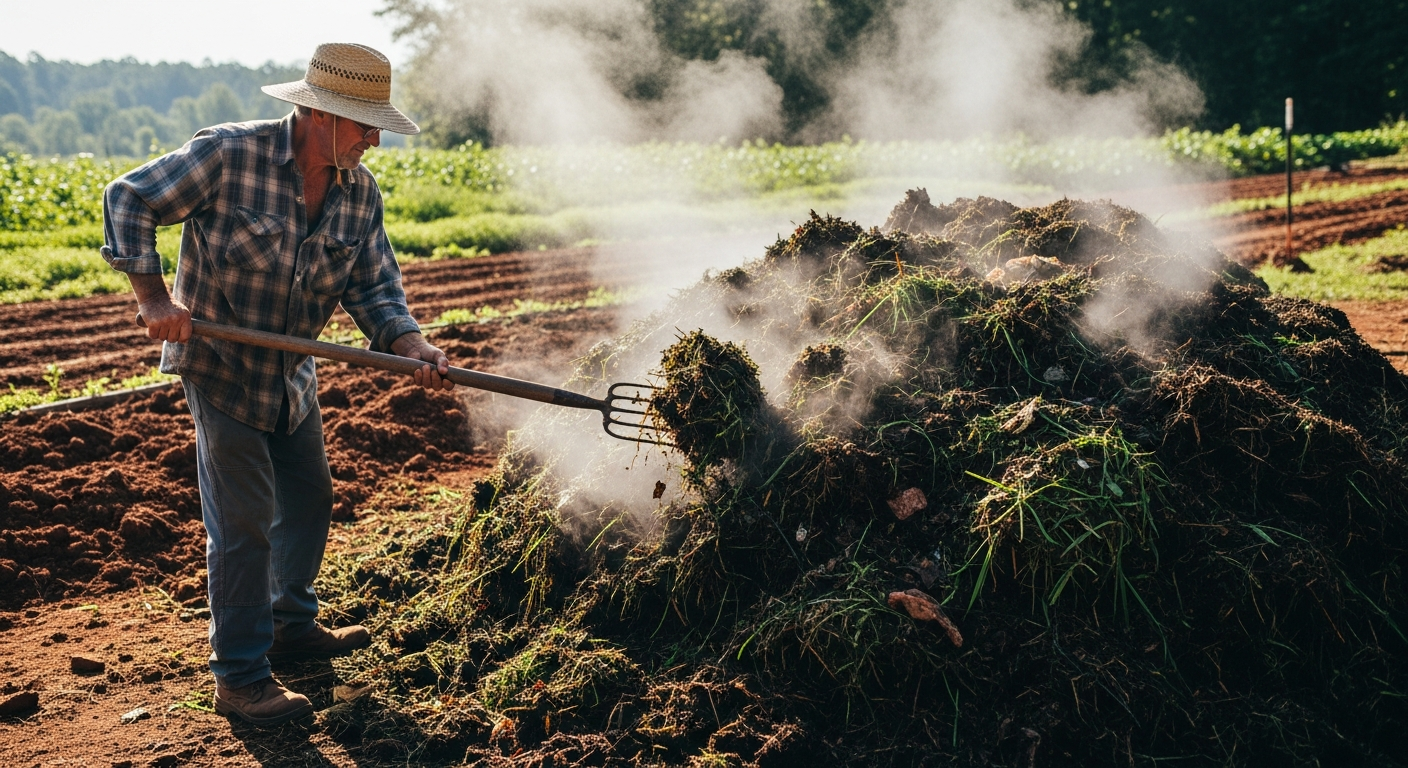
Start with a 6-inch layer of coarse browns (like twigs) at the bottom for aeration. Then, alternate layers of greens and browns, watering each layer as you go. The pile should feel like a wrung-out sponge—moist, but not soggy. For hot composting, you need a pile at least 3x3x3 feet to generate enough heat to kill weed seeds and pathogens. Turn the pile with a pitchfork every 7-14 days to aerate it, which will keep the process aerobic and speed decomposition. A properly managed hot pile can reach temperatures of 130-160°F (55-70°C) and produce finished compost in as little as 4-6 weeks.
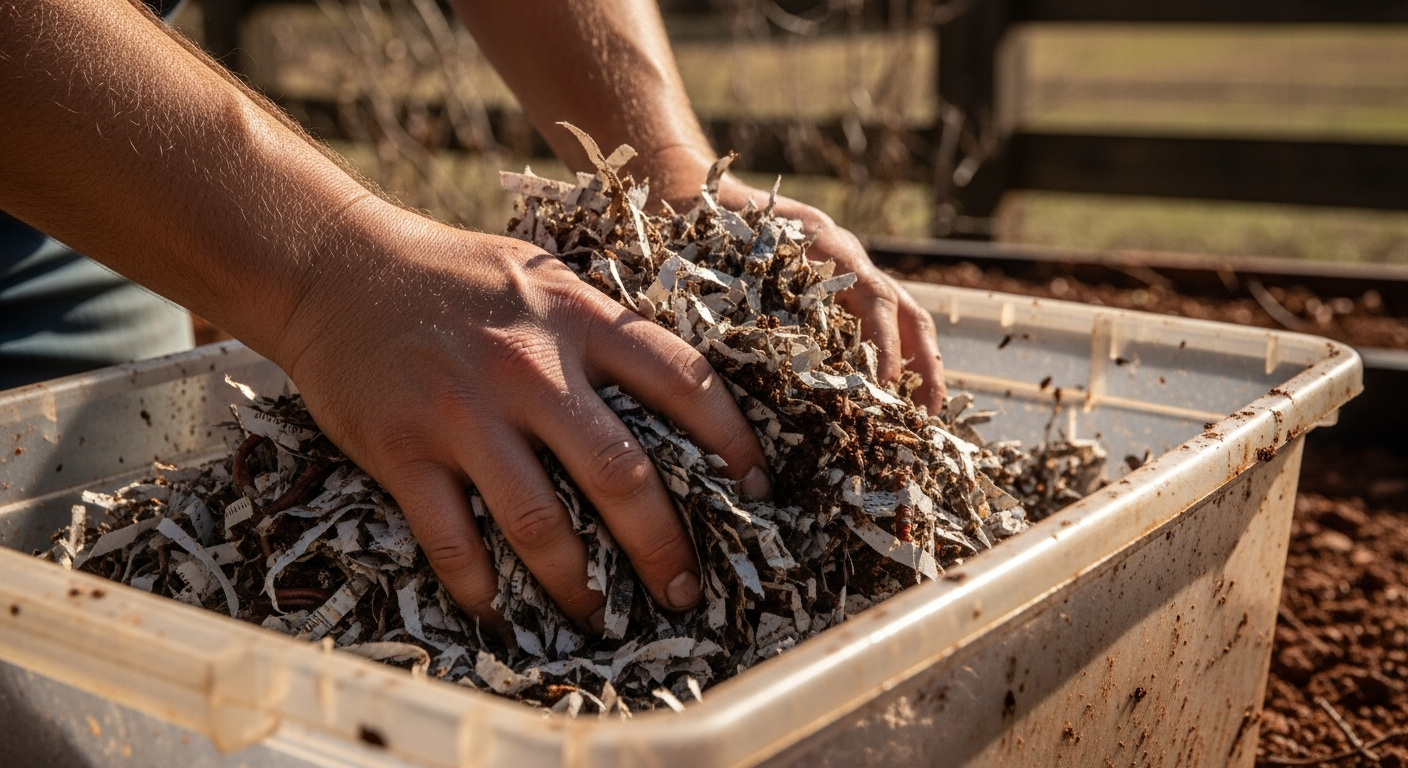
Method 2: Vermicomposting (Worm Composting)
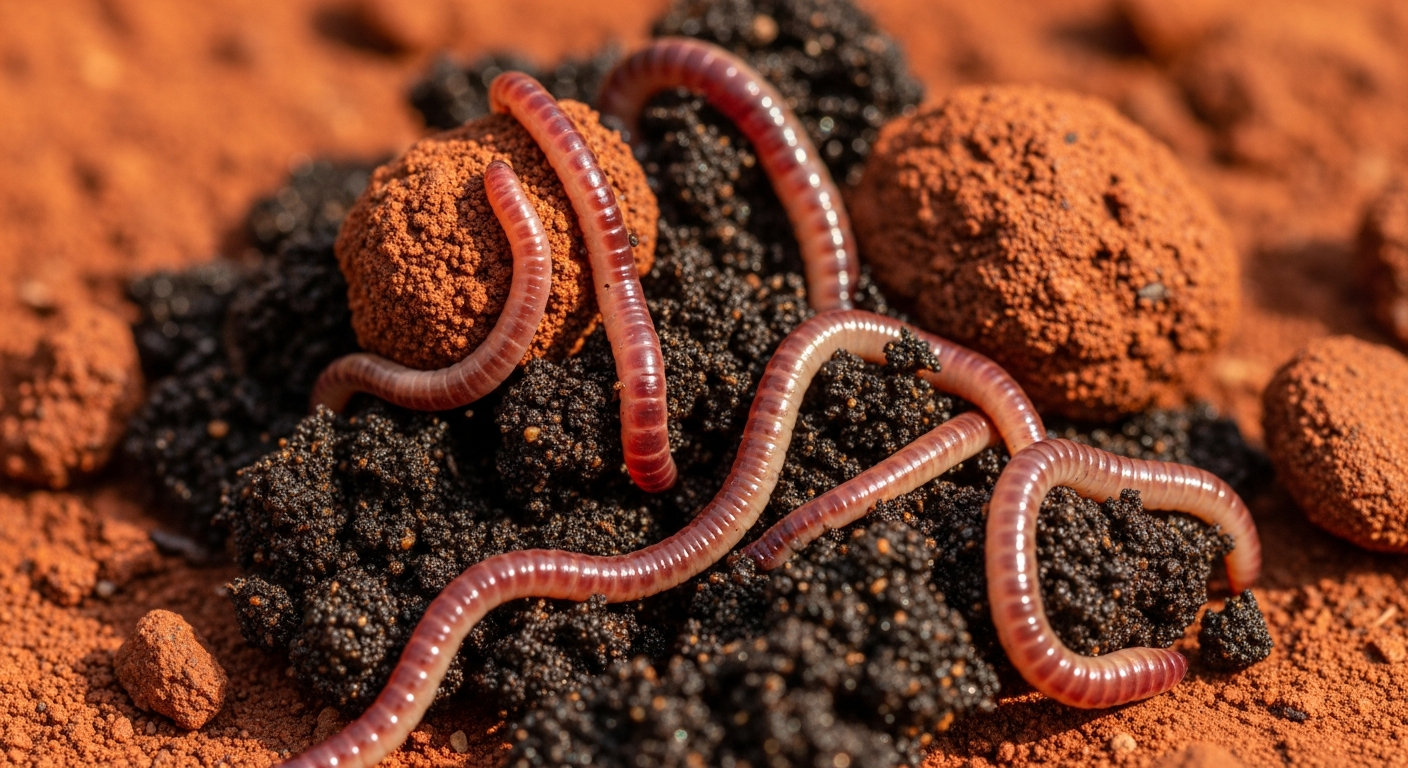
Vermicomposting is an excellent method for those with limited space, like apartment dwellers or those with small patios. It uses specific composting worms, most commonly Red Wigglers (Eisenia fetida), to process food scraps into nutrient-dense worm castings (vermicast), one of the best soil amendments available.
Step 1: Set Up Your Worm Bin
You can purchase a stacking worm bin or build a simple one from an opaque plastic tote. Drill several holes in the bottom for drainage and in the lid for ventilation. The ideal environment for worms is dark and moist.
Step 2: Create the Bedding
Fill the bin about three-quarters full with moist bedding material. Shredded newspaper (avoiding glossy colored inks), cardboard, coconut coir, or aged leaves all work well. Moisten the bedding until it has the consistency of a damp sponge and fluff it up to create air pockets.
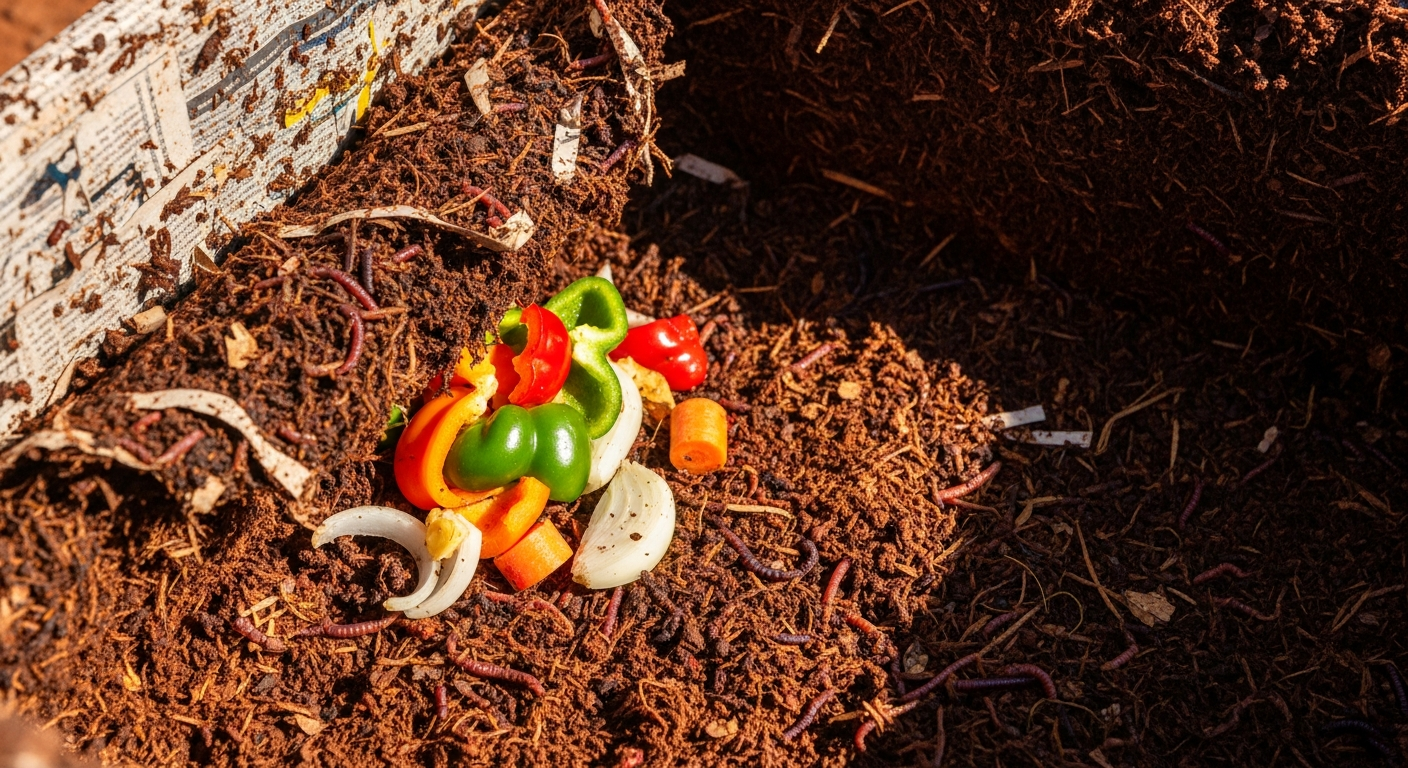
Step 3: Introduce Worms and Feed Them
Order about one pound of Red Wigglers (Eisenia fetida) per square foot of bin surface area. Gently place them on top of the bedding and let them burrow down. Wait a few days before the first feeding. To feed, bury small amounts of kitchen scraps under the bedding in a different spot each time. Good foods include fruit and vegetable peels, coffee grounds, tea bags, and crushed eggshells. Avoid meat, dairy, oily foods, and excessive citrus, as these can cause odors and harm the worms.
Method 3: Bokashi Composting
Bokashi is a fascinating and fast anaerobic (oxygen-free) process that originates from Japan. It doesn’t decompose waste in the traditional sense; it ferments it using a special inoculant—Bokashi bran, which is infused with Effective Microorganisms (EM). The major advantage is its ability to handle materials that traditional piles can’t, including meat, dairy, and oils.
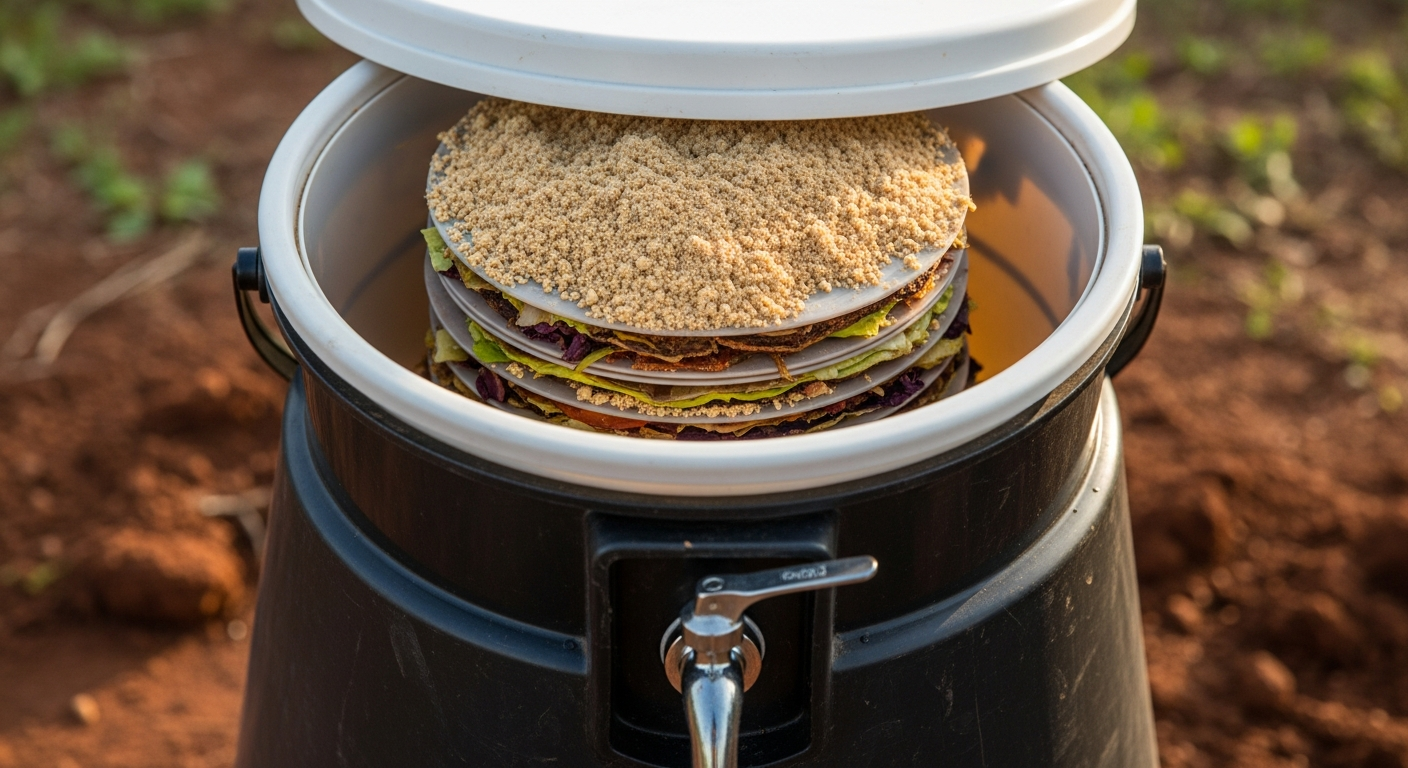
Step 1: Prepare the Bokashi Bin
You need an airtight container, typically a specialized Bokashi bucket with a spigot at the bottom to drain off the ‘Bokashi tea’—a liquid byproduct that can be diluted and used as a potent liquid fertilizer.
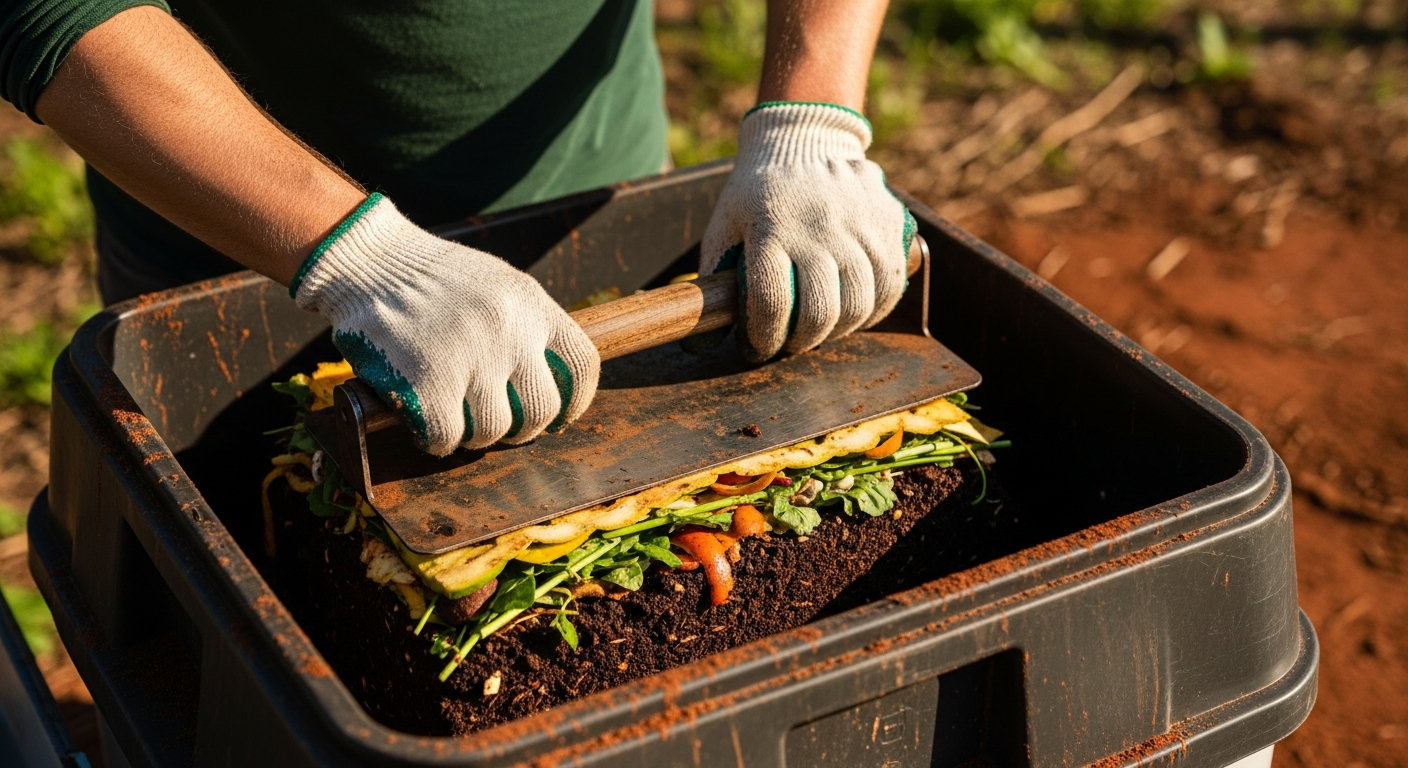
Step 2: Layer and Ferment
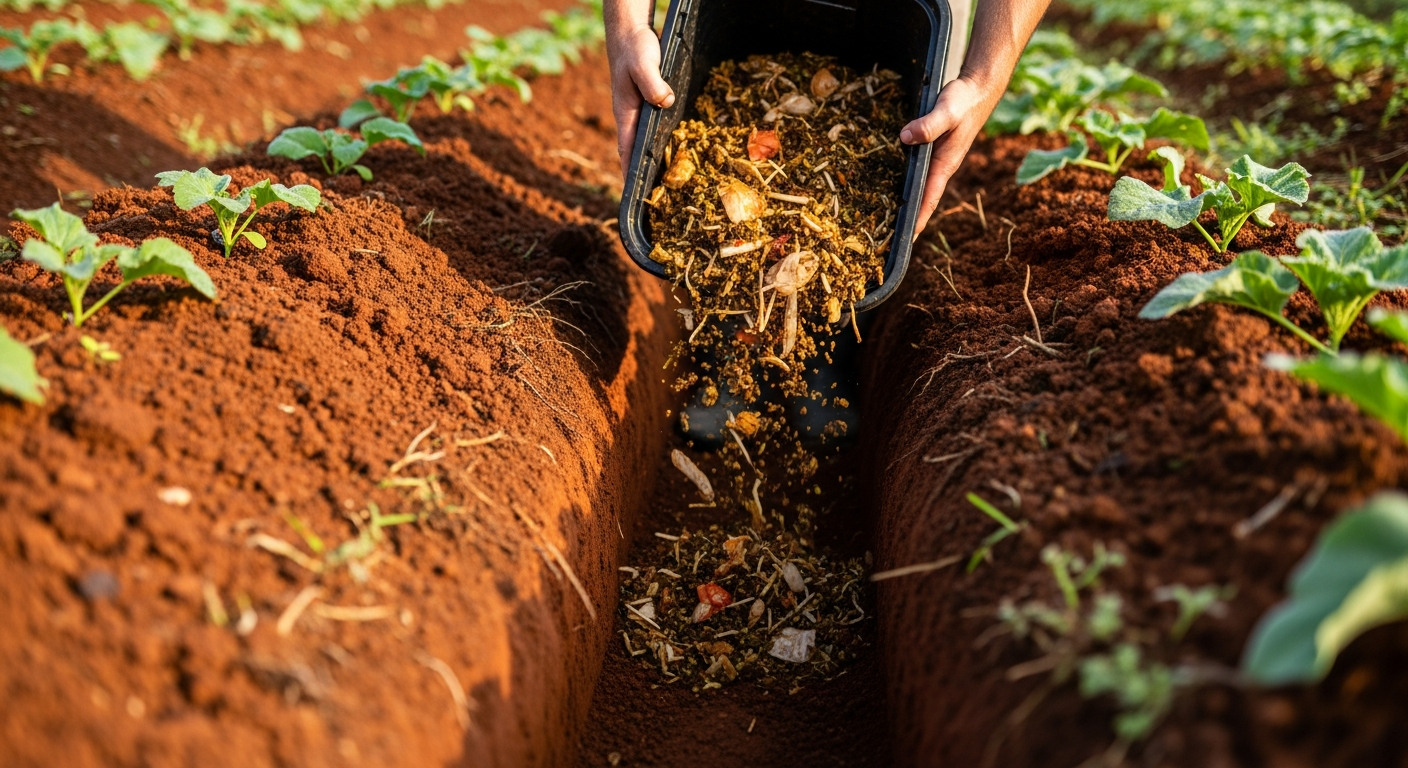
Add your day’s food scraps to the bin in a thin layer. This can include all food waste, even meat and bones. For every layer of waste, add a generous sprinkle of Bokashi bran. Press down firmly on the layer to remove as much air as possible, then seal the lid tightly. Repeat this process until the bin is full. It’s crucial to keep the bin sealed at all times except when adding new scraps.
Step 3: The Two-Stage Finish
Once the bin is full, seal it and let it sit undisturbed for at least two weeks to complete the fermentation process. The contents will not look like finished compost; they will be pickled. This pre-compost must then be buried in the garden soil, in a trench, or added to a traditional compost pile to finish breaking down. The fermented material decomposes very rapidly in the soil, usually within 2-4 weeks, releasing a wealth of nutrients and beneficial microbes directly into the root zone.
Conclusion
Whether you choose the slow and steady rhythm of a cold compost pile, the industrious efficiency of a hot pile, the contained ecosystem of a worm bin, or the unique fermentation of Bokashi, you are participating in a vital natural cycle. By transforming waste into a resource, you not only feed your garden but also improve your soil’s long-term health, structure, and resilience. There is no single ‘best’ method—only the one that best fits your space, lifestyle, and gardening goals. Start small, observe the process, and enjoy the satisfaction of creating your own black gold.
Frequently Asked Questions (FAQ)
- 1. My compost pile smells bad. What did I do wrong?
- A foul, ammonia-like smell usually indicates too much nitrogen (‘greens’) and not enough carbon (‘browns’), or the pile is too wet and has gone anaerobic. To fix it, turn the pile thoroughly to add oxygen and mix in a generous amount of dry, brown materials like leaves, straw, or shredded cardboard.
- 2. What materials should I never put in a traditional compost pile?
- Avoid meat, fish, bones, dairy products, and oily foods, as they can attract pests and create foul odors. Also, avoid diseased plants, pernicious weeds that have gone to seed (like bindweed), and pet waste from dogs or cats.
- 3. How do I know when my compost is finished and ready to use?
- Finished compost will be dark brown, crumbly, and have a rich, earthy smell like a forest floor. You should not be able to identify the original materials. The pile’s internal temperature will also have cooled to match the ambient air temperature.
- 4. Can I just throw kitchen scraps directly into my garden?
- While it’s better than sending them to a landfill, it’s not ideal. Uncomposted food scraps can attract pests, and the decomposition process in the soil can temporarily ‘rob’ nitrogen from your plants, causing deficiencies. It’s best to compost them first.
- 5. What’s the difference between soil and compost?
- Soil is a complex mixture of minerals (sand, silt, clay), organic matter, water, and air. Compost is a soil amendment, not a growing medium on its own. It is a concentrated form of organic matter that you add to soil to improve its structure and fertility.
- 6. Is compost tea useful?
- Yes, compost tea is a liquid fertilizer made by steeping finished compost in water. It transfers the beneficial soluble nutrients and microorganisms into a liquid form that can be easily absorbed by plant roots and leaves. It’s an excellent supplement during the growing season.
- 7. My compost pile isn’t heating up. What’s wrong?
- For a hot pile, a lack of heat is usually due to one of three things: the pile is too small (it needs to be at least 3x3x3 feet), it’s too dry (add water), or it lacks nitrogen (add more ‘green’ materials).
- 8. Do I need to buy special worms for vermicomposting?
- Yes, you cannot use common earthworms or nightcrawlers from your garden. You need specific surface-dwelling species that thrive in concentrated organic matter. Red Wigglers (Eisenia fetida) are the most common and effective choice.
- 9. How often should I drain the liquid from my Bokashi bin?
- Drain the ‘Bokashi tea’ every 1-2 days. This liquid is highly acidic and full of microbes, so it must be drained to prevent the system from failing. Dilute it at a 1:100 ratio with water before using it as a fertilizer.
- 10. Can I mix these composting methods?
- Absolutely! They work very well together. For example, you can add finished vermicast to your traditional pile to inoculate it with beneficial life, or you can add the fermented Bokashi pre-compost to a hot compost pile to accelerate its breakdown.